VecFever documentation
Serial Port Modification
I have been using VF with serial ports myself almost since the very start and the use of this port expanded over time, I have written a blog entry a while back giving some background:
Although I have build a very few dev. VF with serial port for others hardly anyone needs a serial port for a Vectrex, besides maybe running VecMAME for a day or two – or tinkering with Forth. However, I have added another dev. mode using the serial port for input data, at first for Malban and myself to upload larger binaries than would fit into the USB ramdisk. And for the gamer pcb this serial port is the only way to upload and test data immediately when developing and testing new code so as an expert option it can be enabled manually there.
Please do note: the serial port used on the vf is a modern (3.3v) uart, not a RS232 port, and cannot be directly hooked up to RS232 due to different voltage levels. This would likely do harm to the vf.
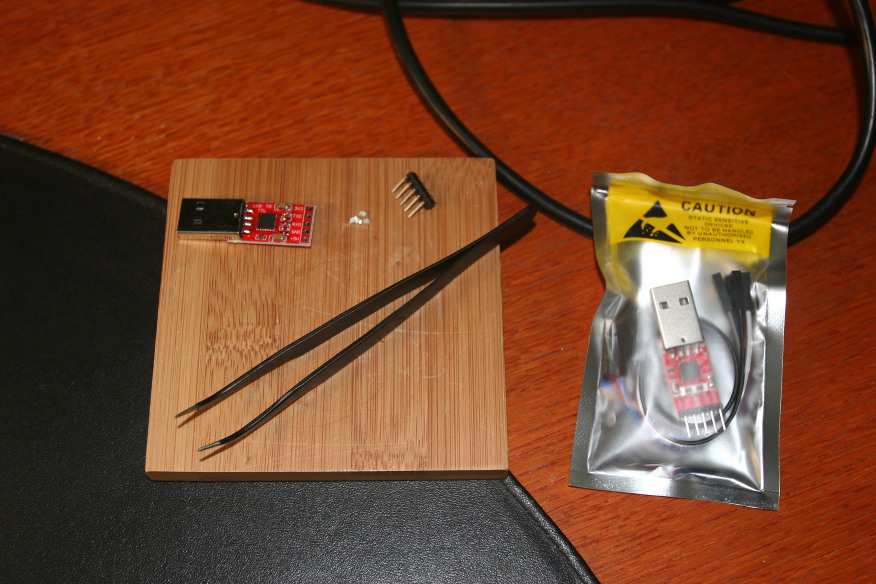
In principle hooking up a uart-usb pcb to this port is simple enough – getting the highest baud rate (reliably) and putting it all into a shell can be a bit fiddly, though, esp. with a led, too. I can recommend the CP2102 SiLabs chipset, the driver works well for several years on my iMac, and I usually remove the LEDs plus their resistors and the pinheader on the uart-usb pcb first. Afterwards I carefully file an opening into a shell – the connector is aligned with the top of the lower part of the shell and only a tiny bit in the recessed, smaller lid of the upper part has to be removed, like so:


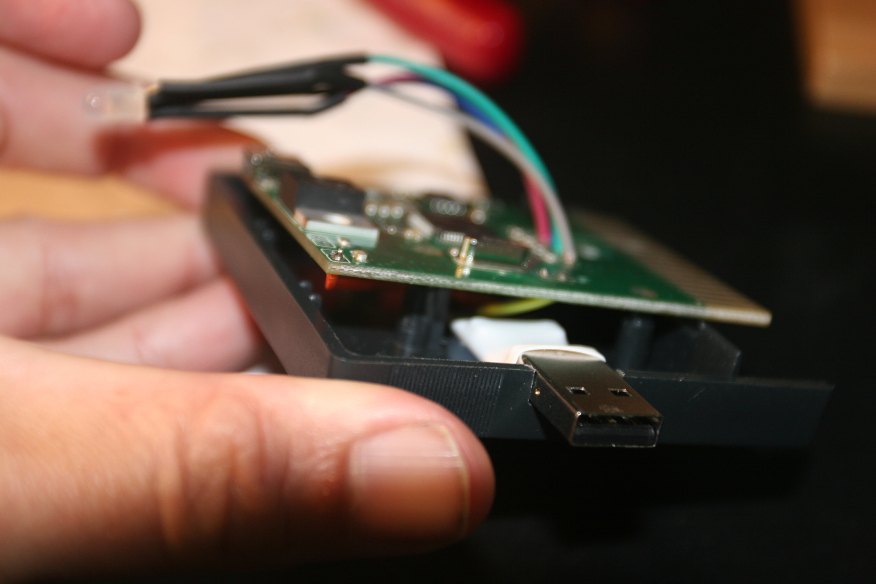
Not too tight or otherwise the lower part of the shell will be bent by the usb connector out of shape. Then for black shells heat-shrink insulation is put around the uart pcb, it is hooked up to the vf pcb (rx / rtx / gnd – the uart pcb is powered via the cable’s usb-5v only when in use) and tested whether the wires are ok and it all fits into the shell. If everything is fine the uart is hot-glued to the bottom of the shell (sometimes put a blob onto the vf pcb to fixate the wires, too) and the shell finally closed hopefully forever. The idea of soldering it all together with pretty small wiring and hot-glueing it all in place is for robustness: wiggling a cable in/out does put some mechanical stress on the uart pcb but hot-gluing the entire thing to the shell so far worked just fine for me.

However for transparent shell this looks a bit ugly so a slightly less robust but better looking way there is to glue the uart pcb to the back of the vf pcb, e.g. with a thicker, two-sided tape or again hot-gluing it in place. By the way: the reason for the position towards the back is that the port is hidden and accessible when the Vectrex is in landscape mode with the Vectrex cart. port below:


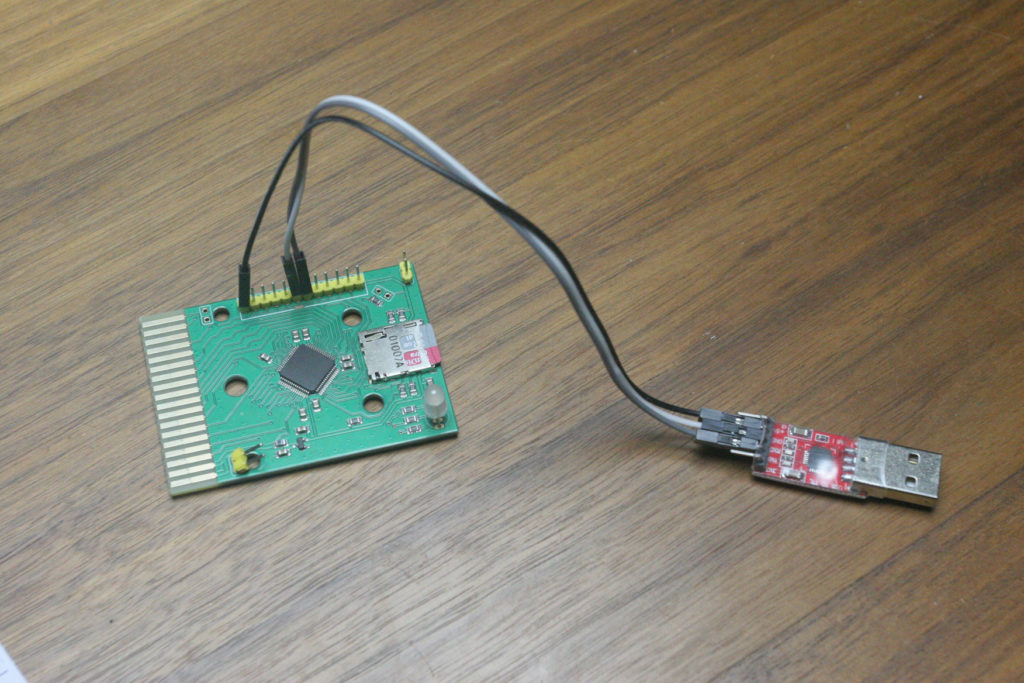
The above pictures show the mod. using a dev. vf pcb but the gamer version is functionally identical, however there it might be a better idea to use a gpio header since if in a shell you might want to detach it when opening the shell to access the micro sd card socket. Or just to hook it up only whenever you need it or to test it at first:
Easiest way to initially check whether RX/TX are hooked up correctly and not swapped and the computer driver works for the uart is to enable the ‘send out filenames’ option for the serial port (btw, this was implemented so that a graphics could be displayed for the currently running game) and check with a terminal application whether the names are received.